
Adobe After Effects is a powerful tool for creating and editing videos. It offers a variety of features for adding special effects, including muzzle flash and shell ejection.
In this tutorial, we will learn how to add muzzle flash and shell ejection to a gun in After Effects.
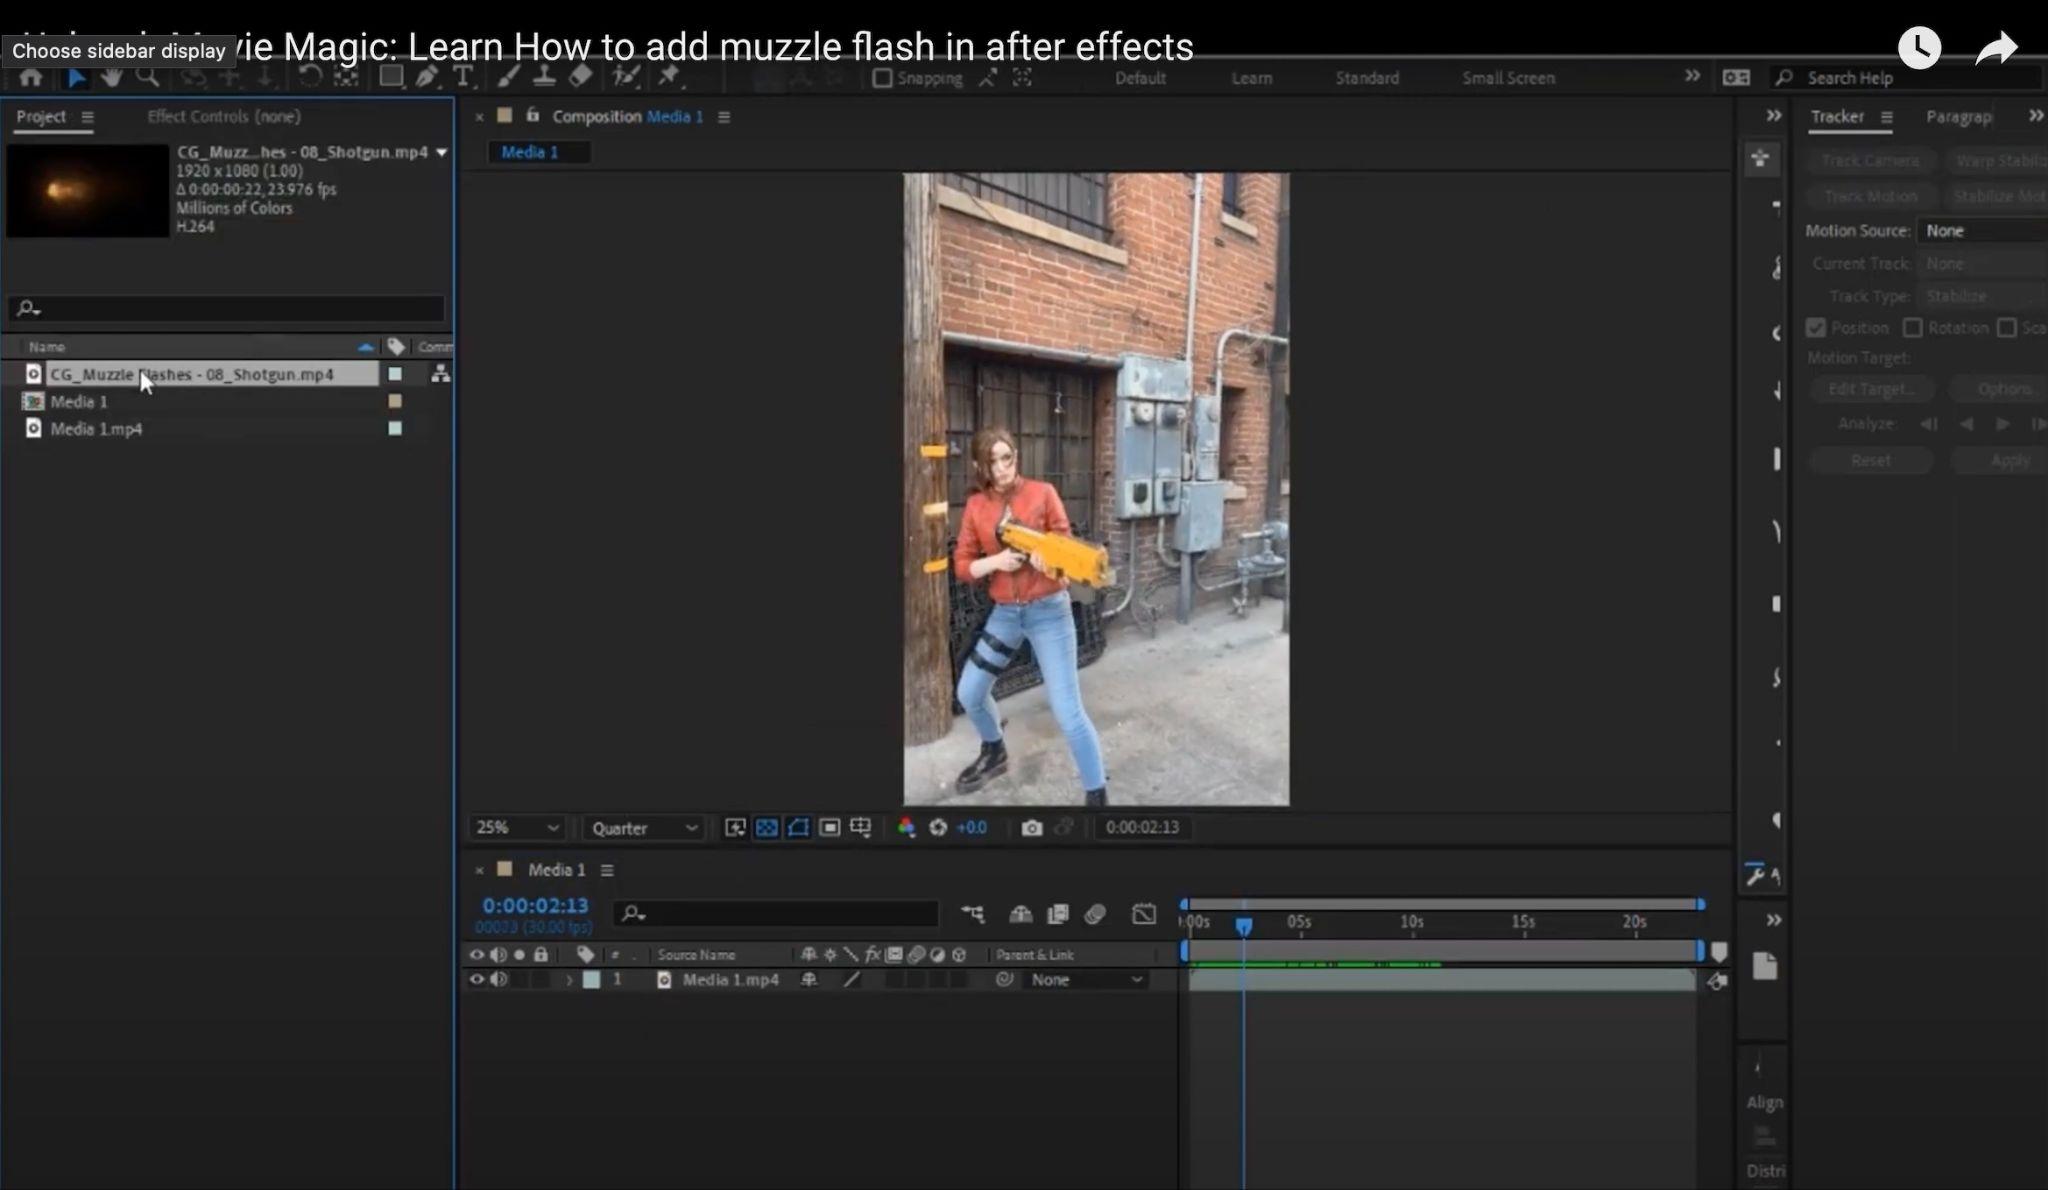
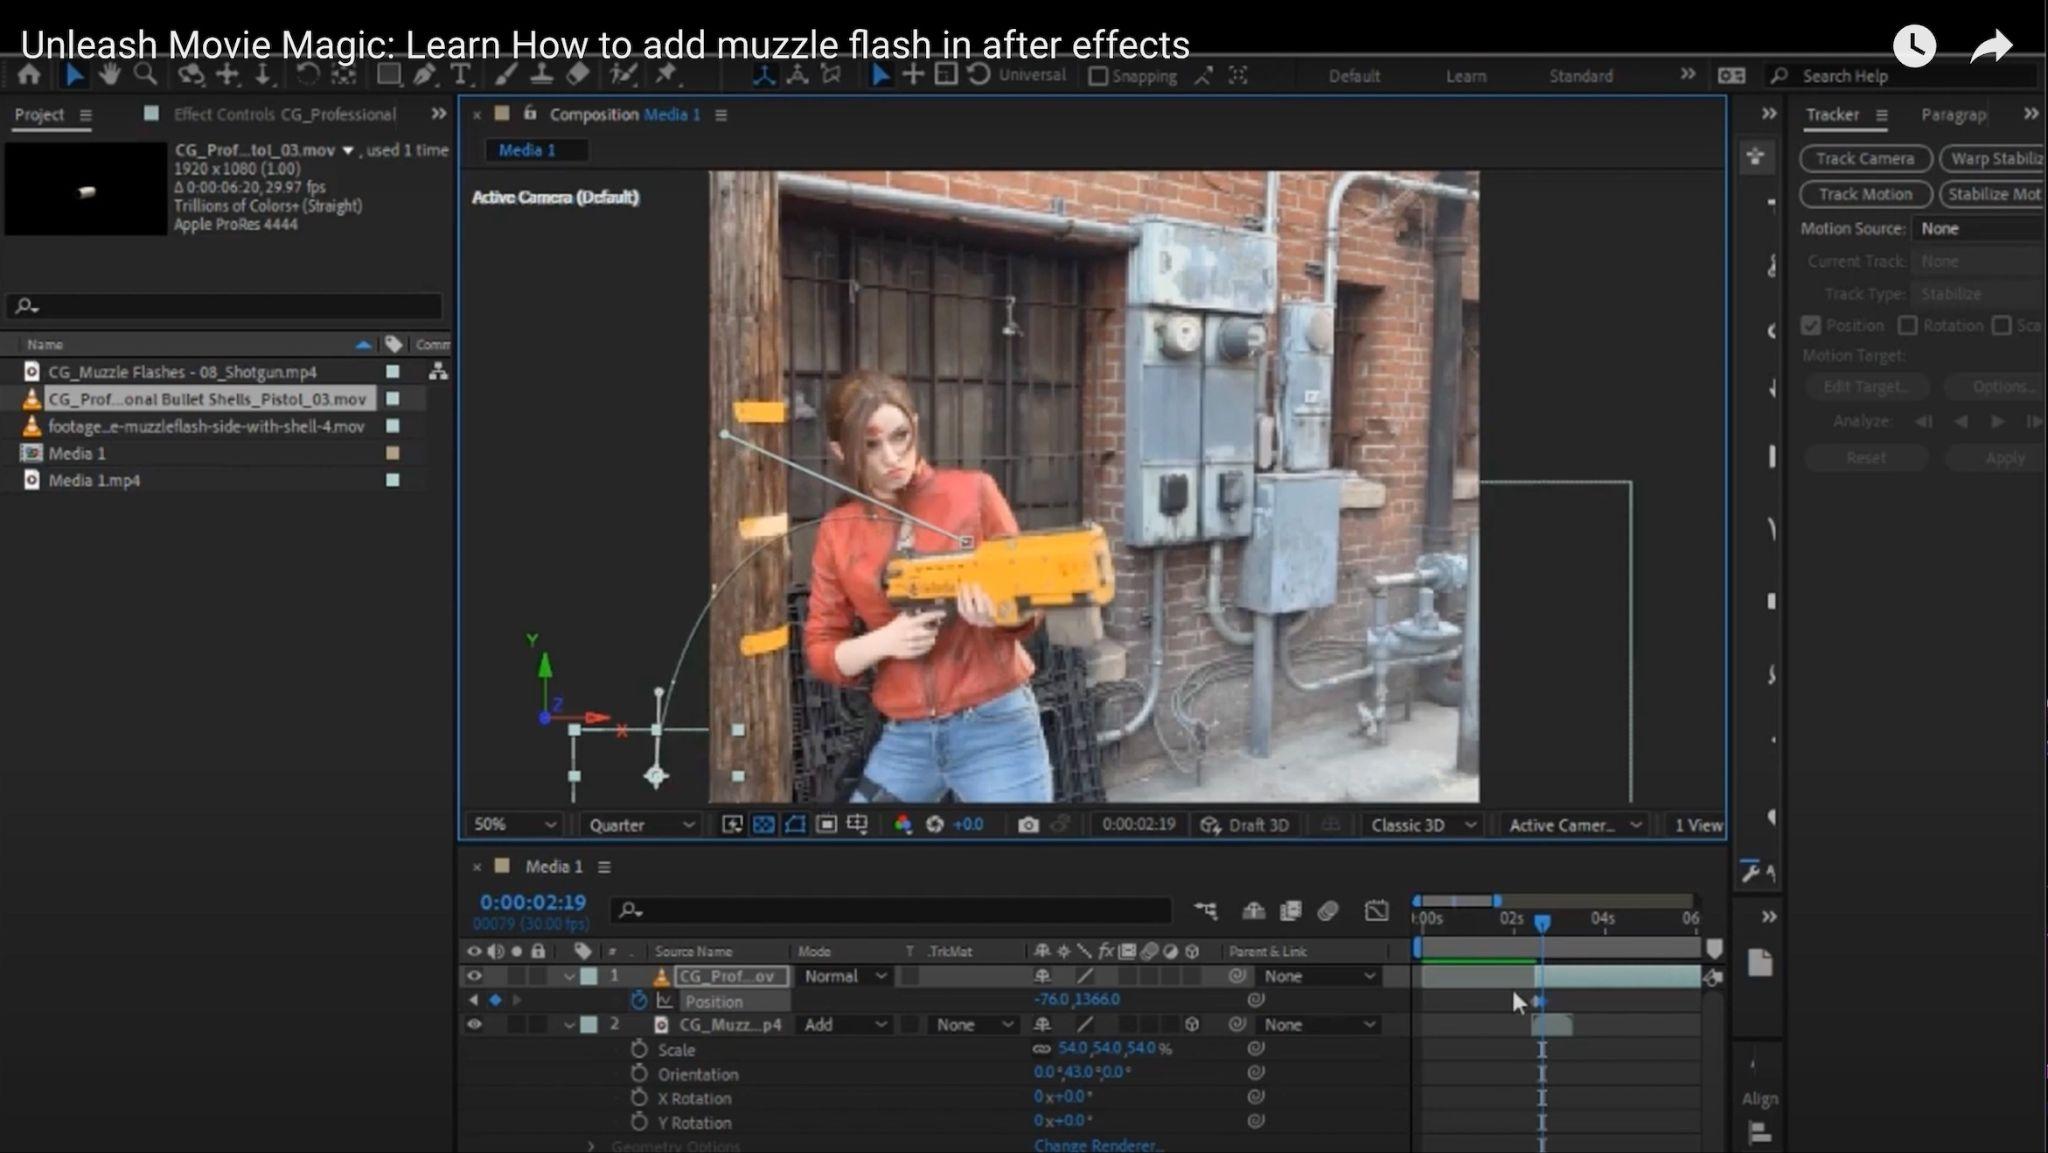
1. Import the footage
The first step is to import the footage of the gun firing. You can do this by dragging and dropping the footage into the After Effects project window.
2. Add the muzzle flash
Next, we need to add the muzzle flash. There are many different muzzle flash assets available online. You can find them by searching for “muzzle flash After Effects”.
Once you have found a muzzle flash asset that you like, import it into the project window.
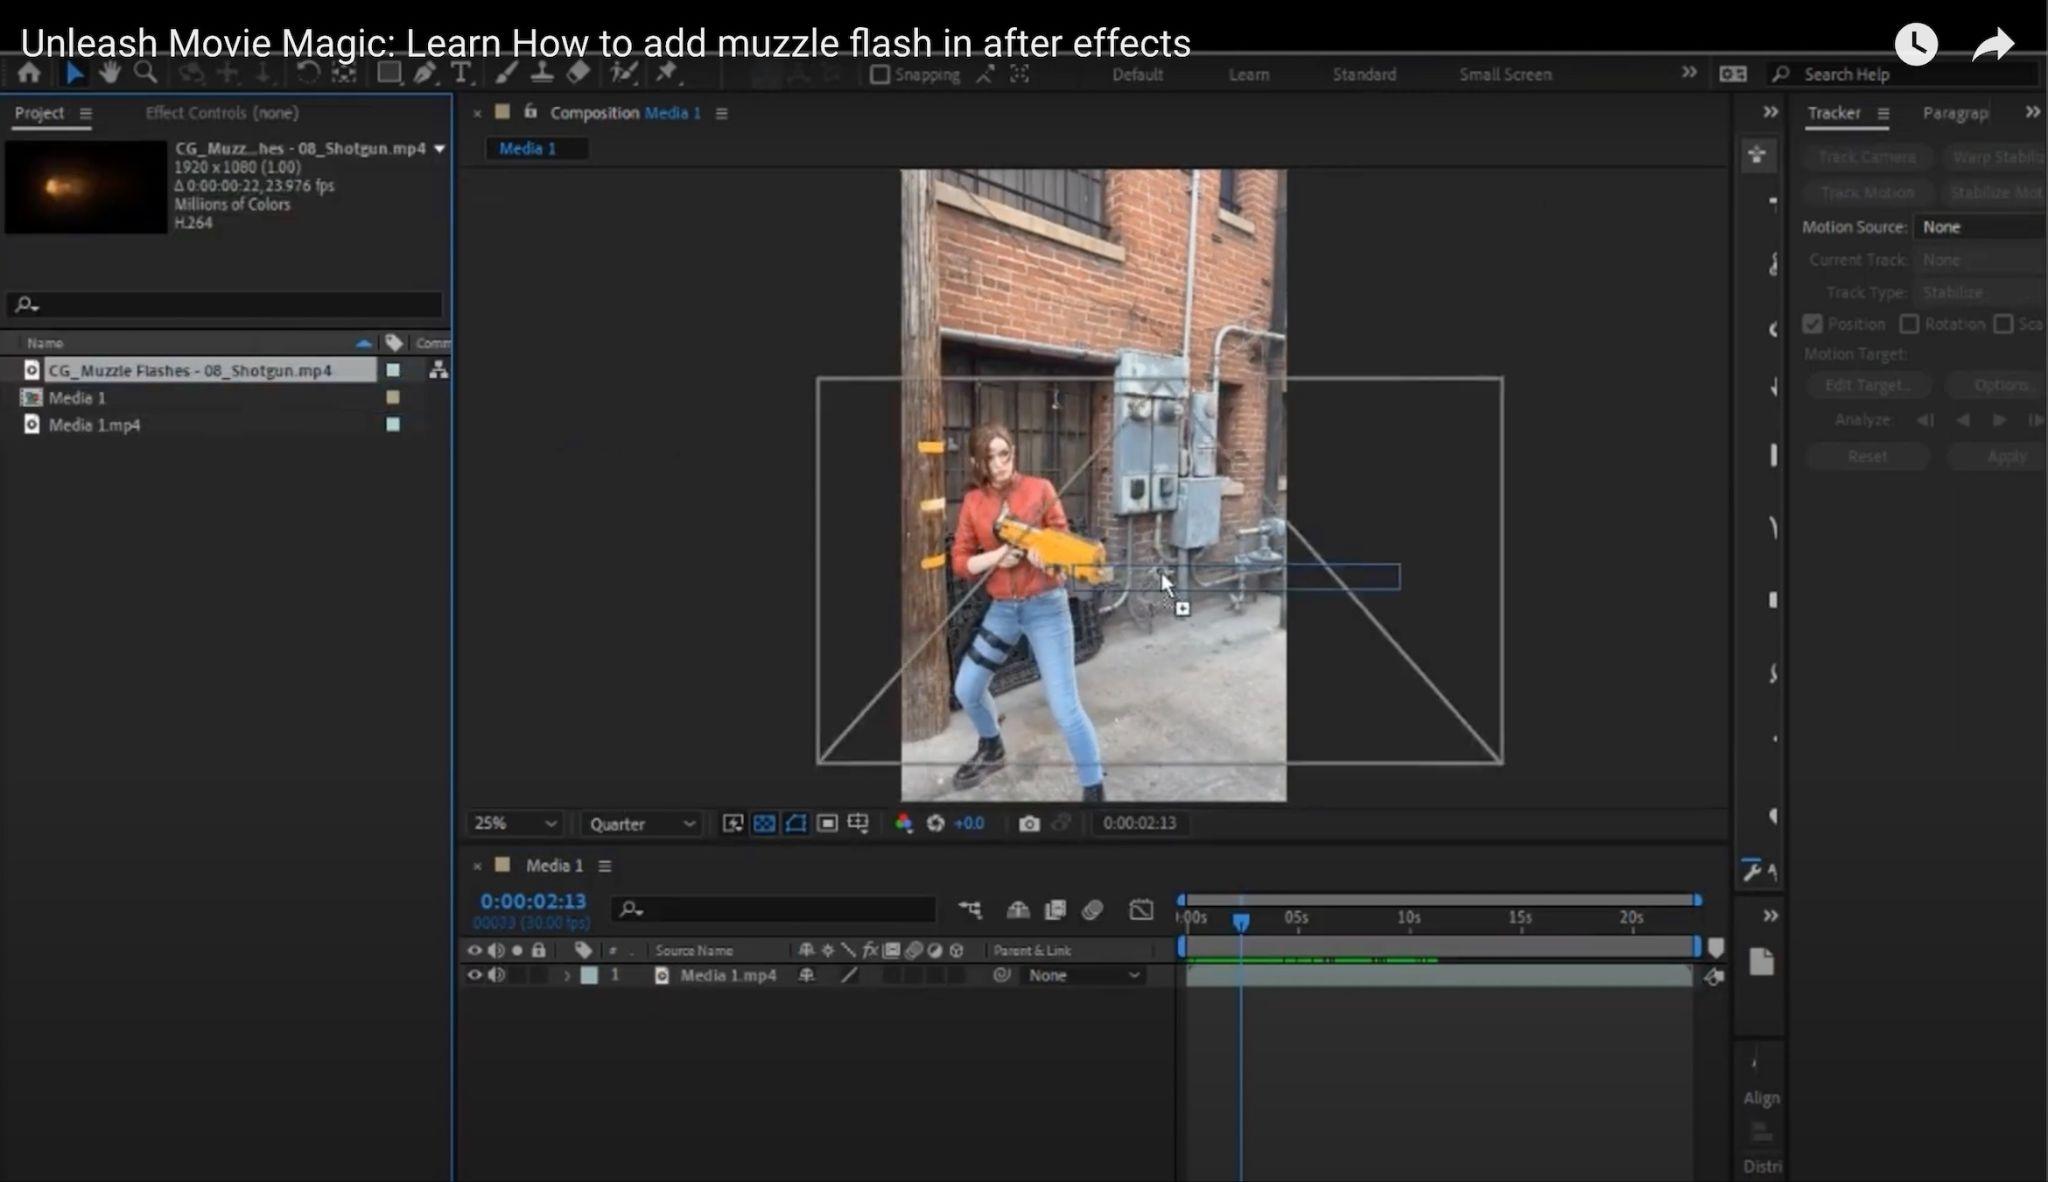
3. Scale and position the muzzle flash
The muzzle flash should be scaled and positioned so that it matches the footage of the gun firing. You can do this by using the Scale and Position tools in the toolbar.
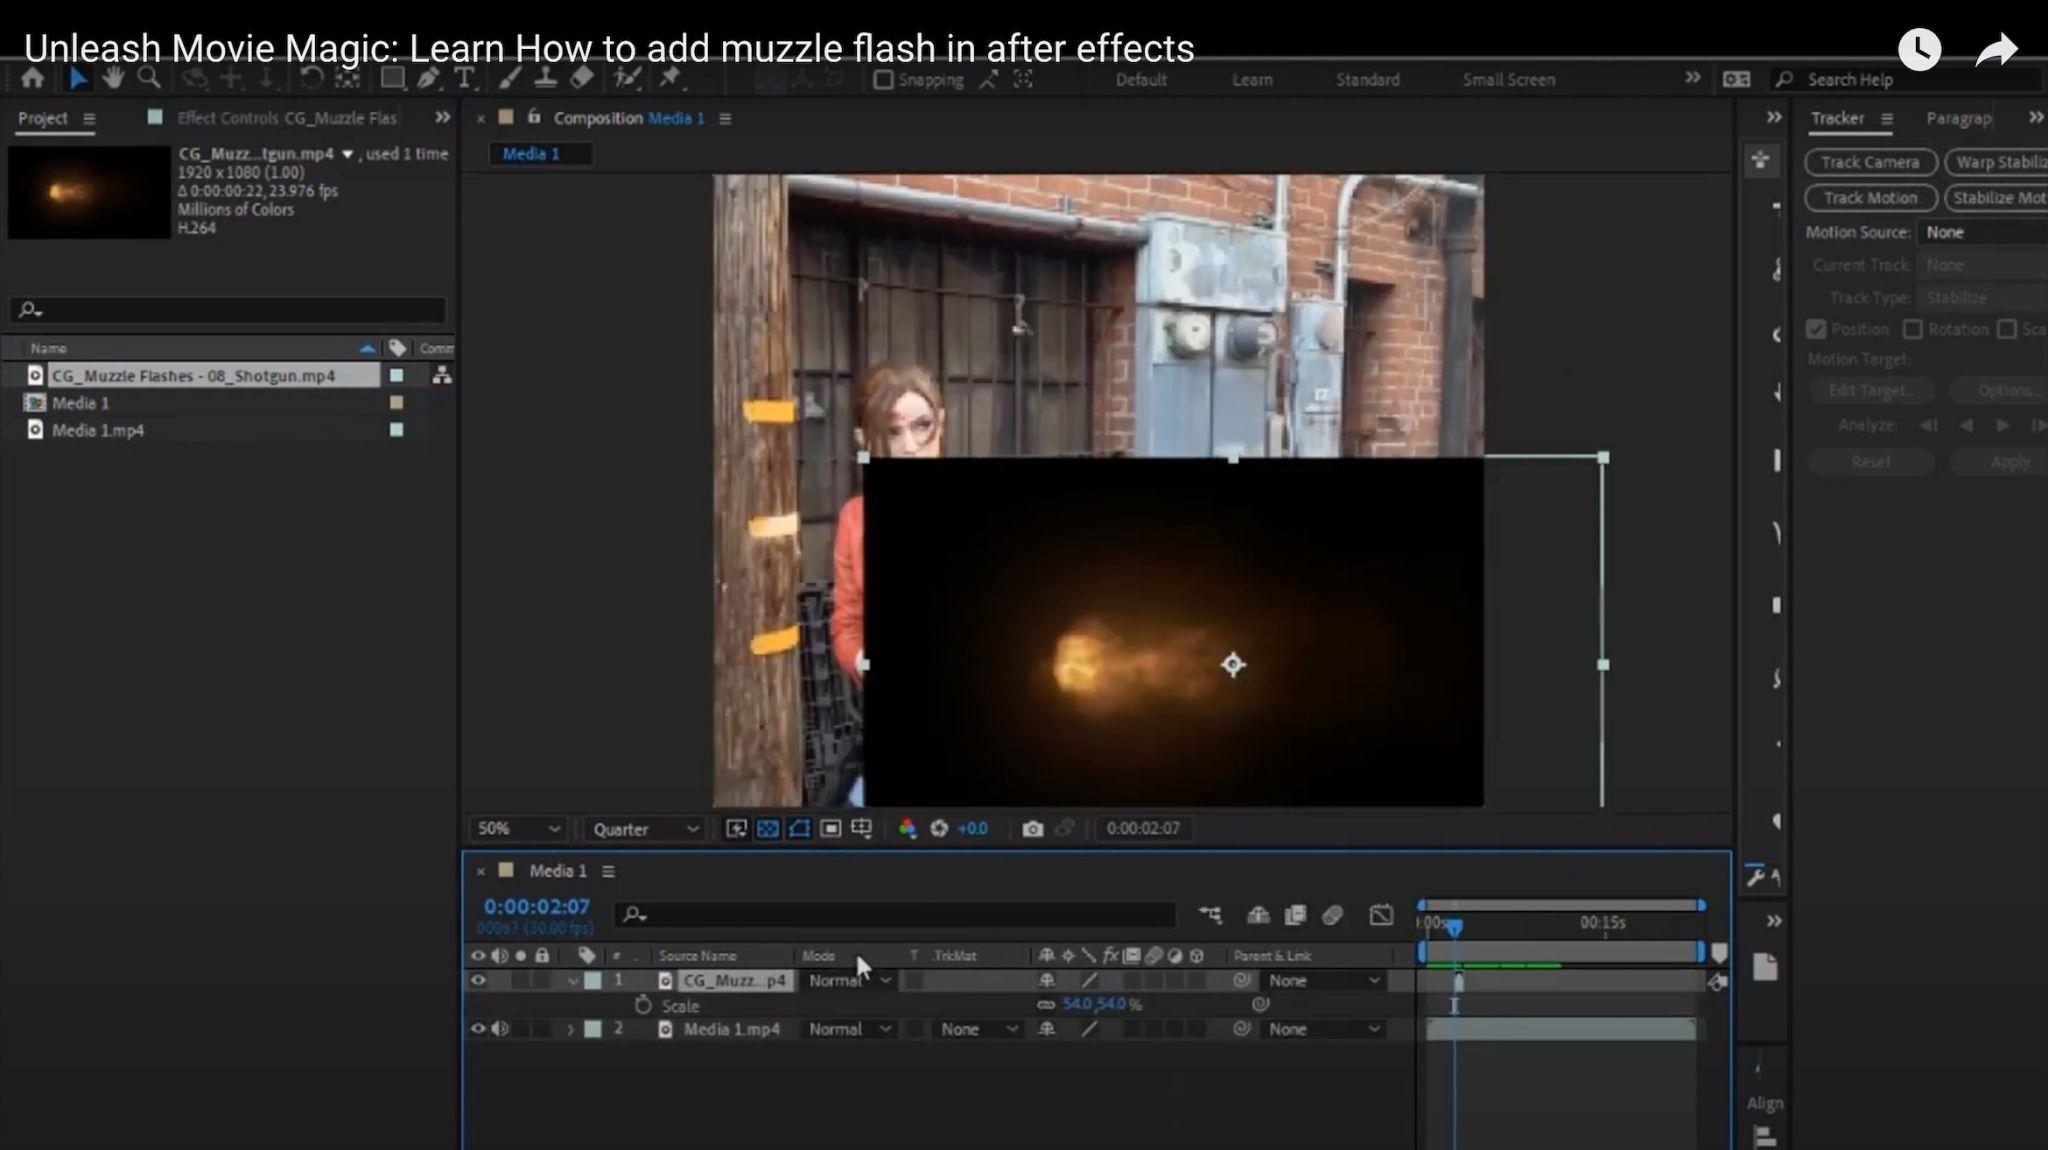
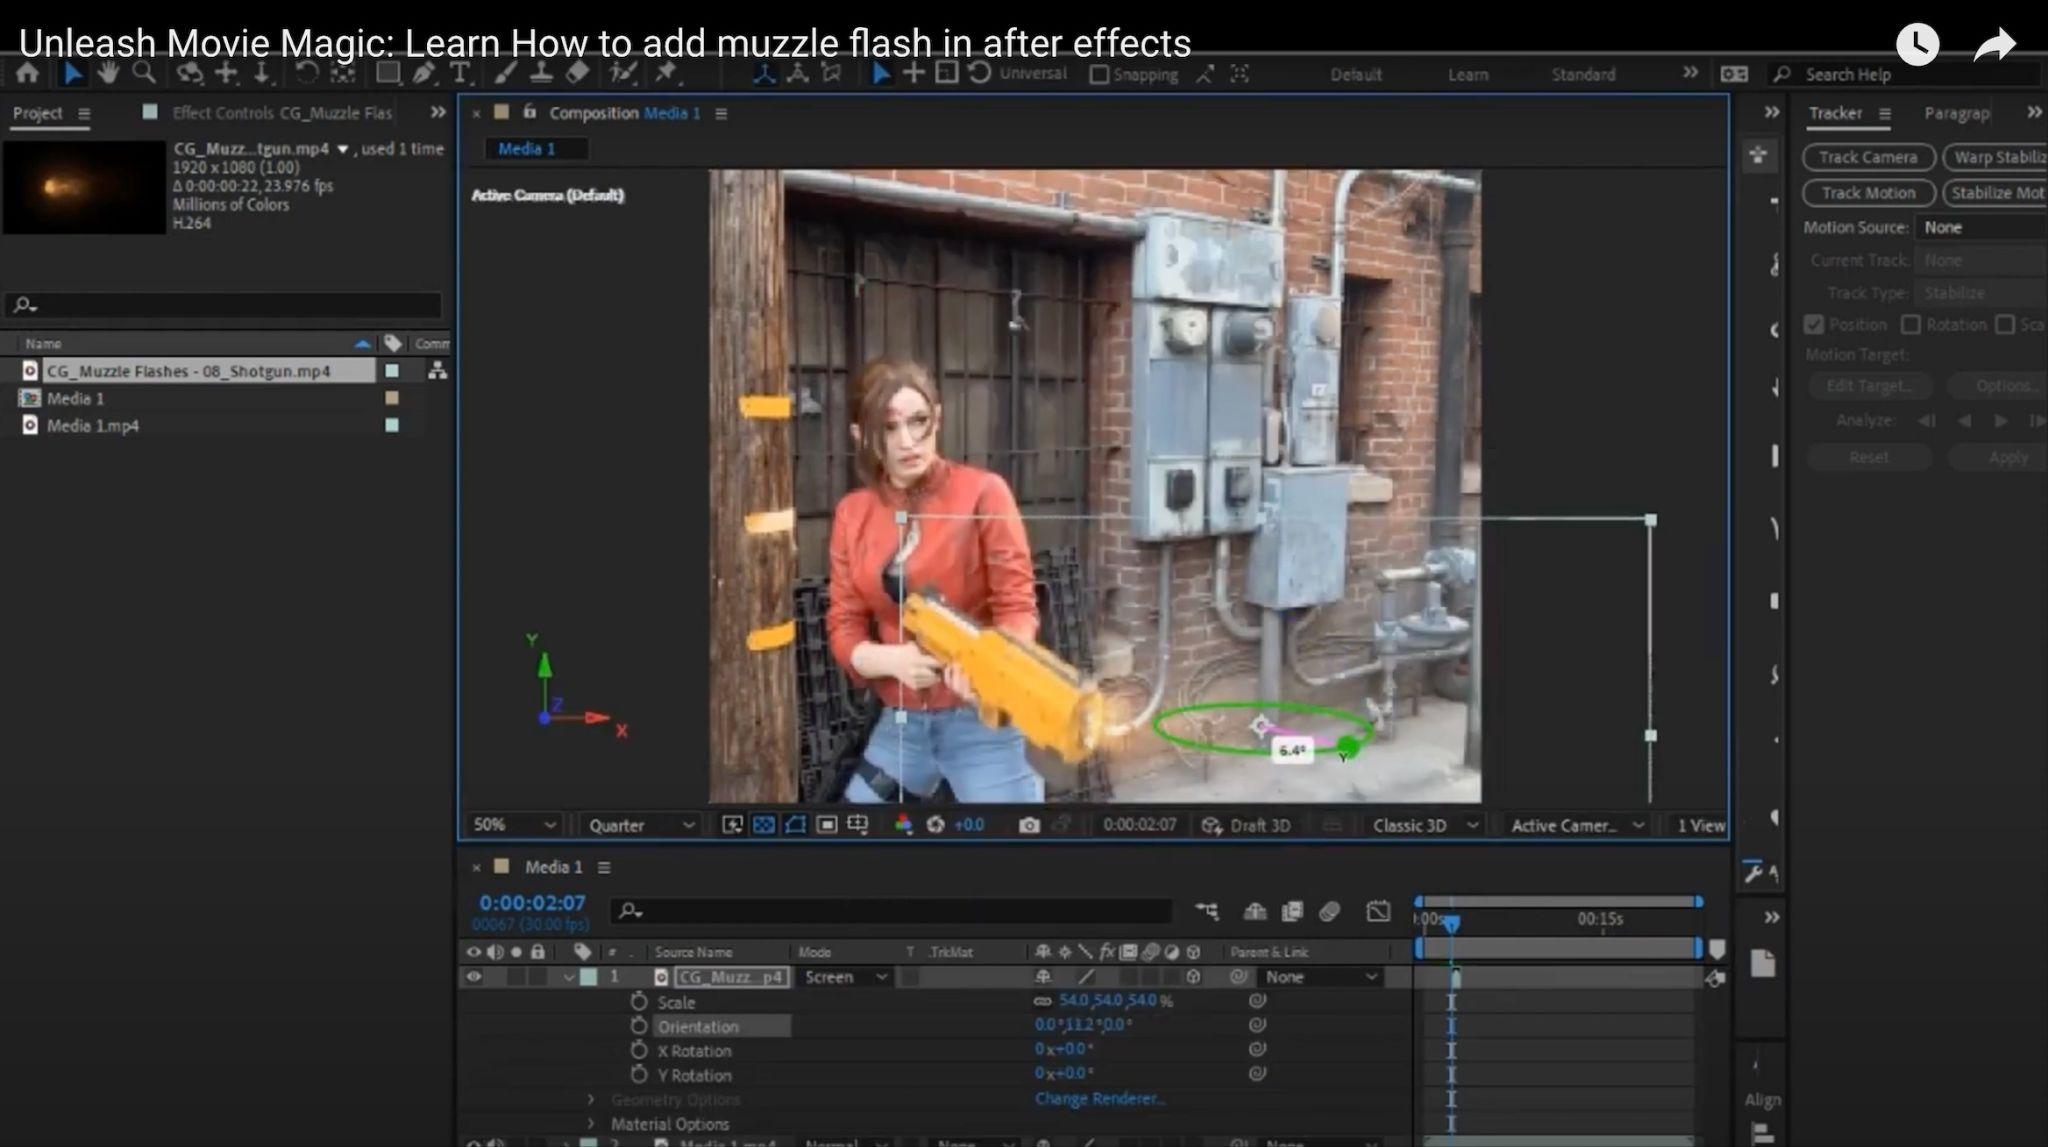
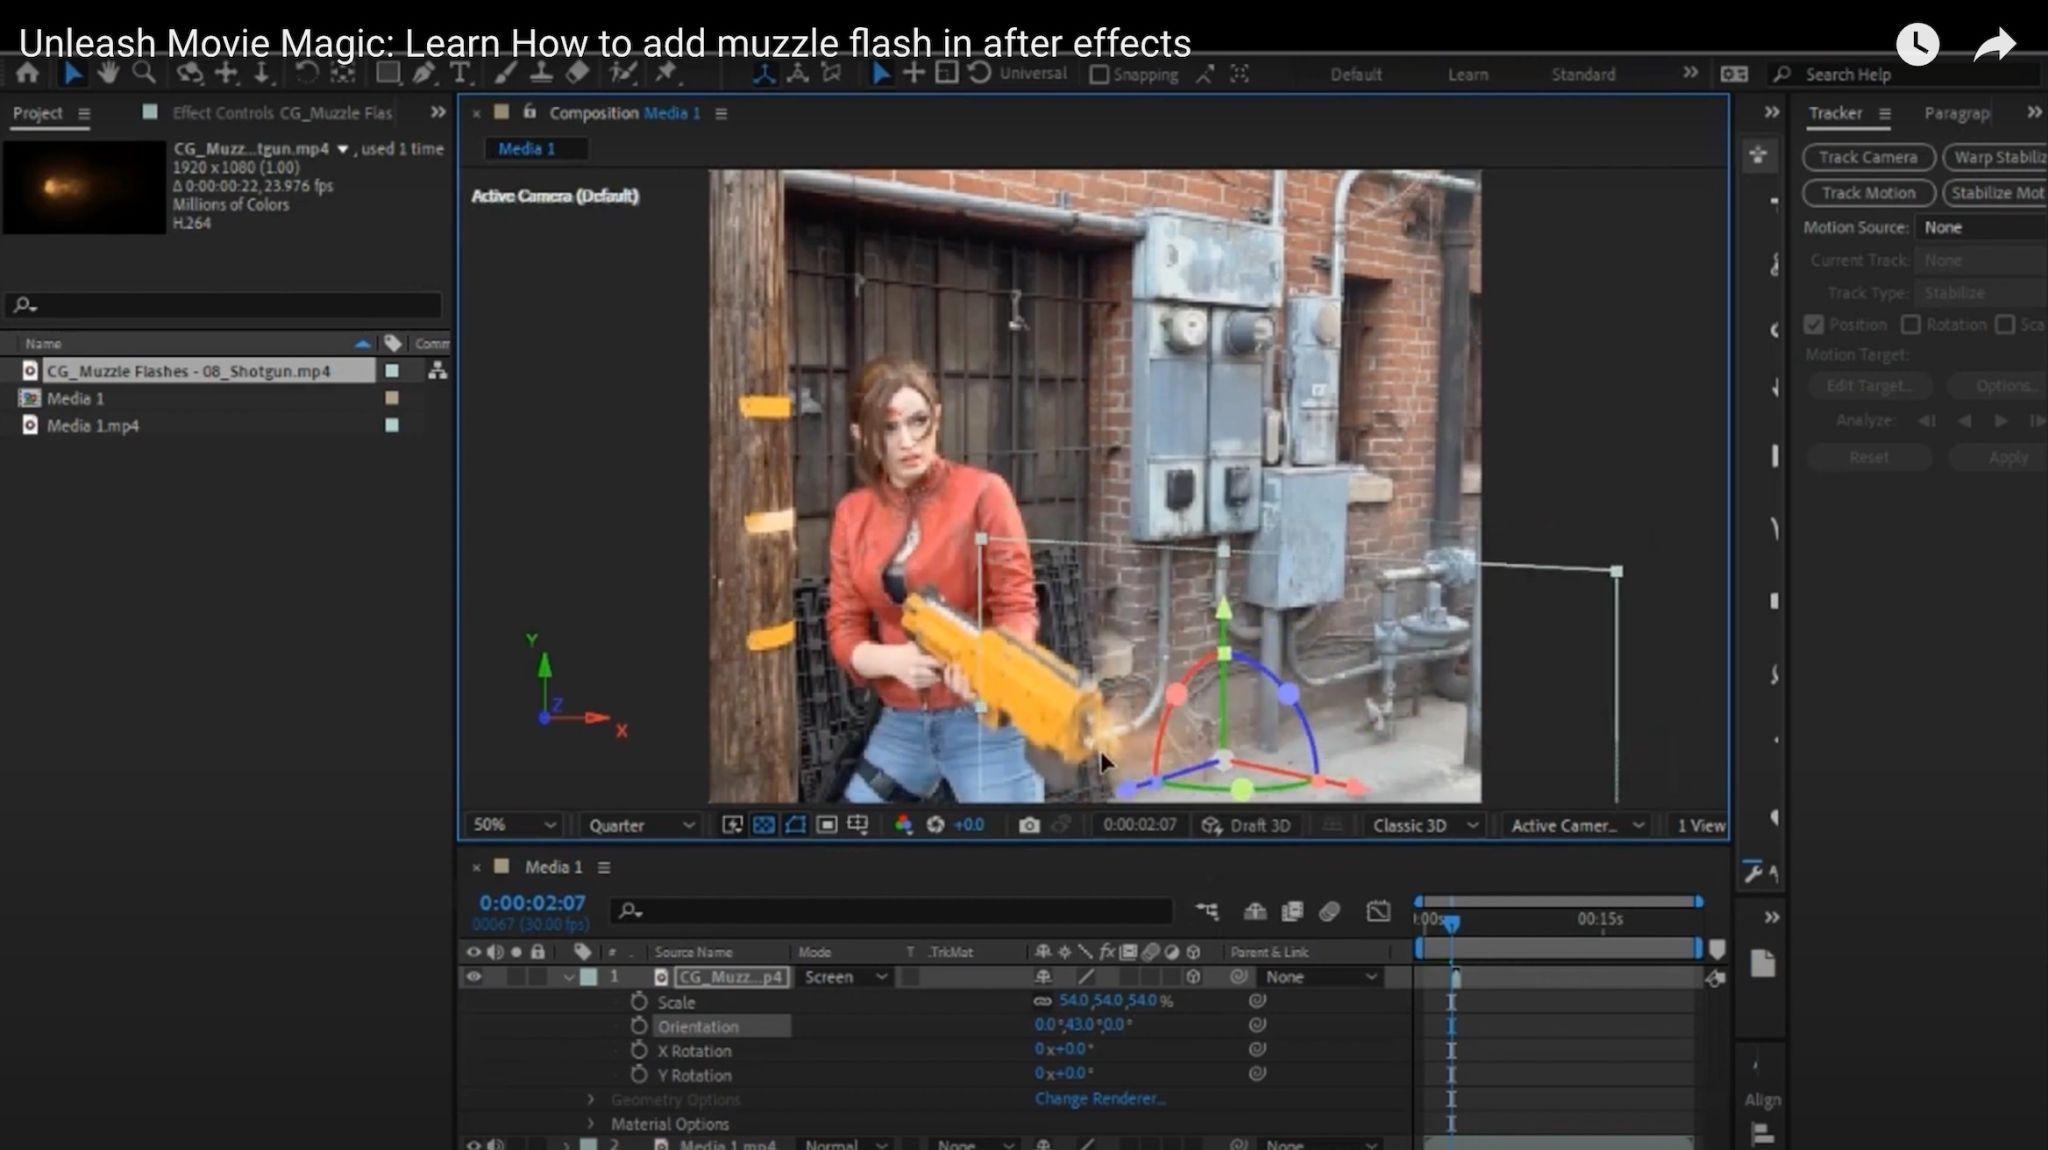
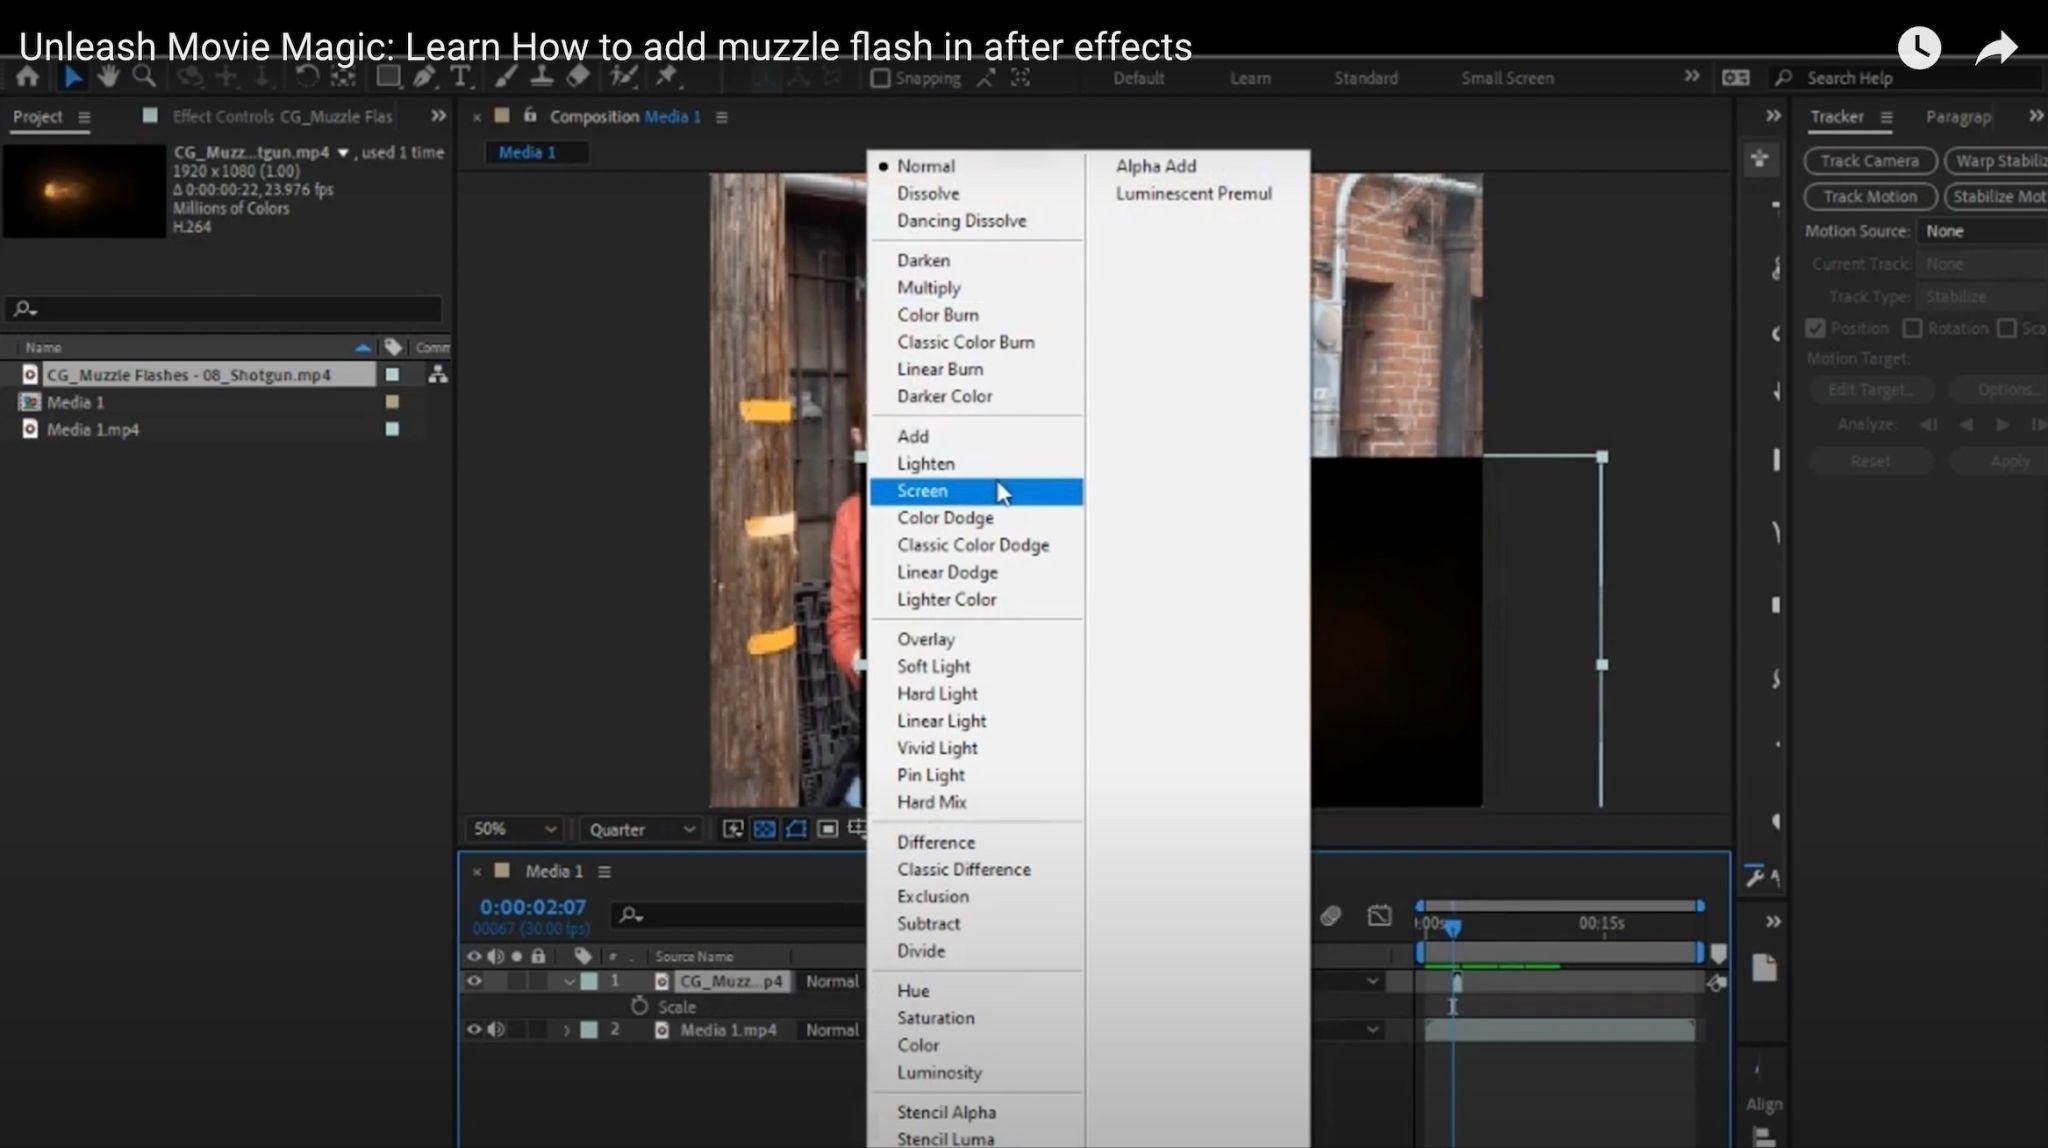
4. Set the blending mode
The blending mode determines how the muzzle flash interacts with the footage. The best blending mode to use will depend on the specific footage. However, a good starting point is to use the “Screen” blending mode.
5. Add the shell ejection
Now, we need to add the shell ejection. There are many different shell ejection assets available online. You can find them by searching for “shell ejection After Effects”.
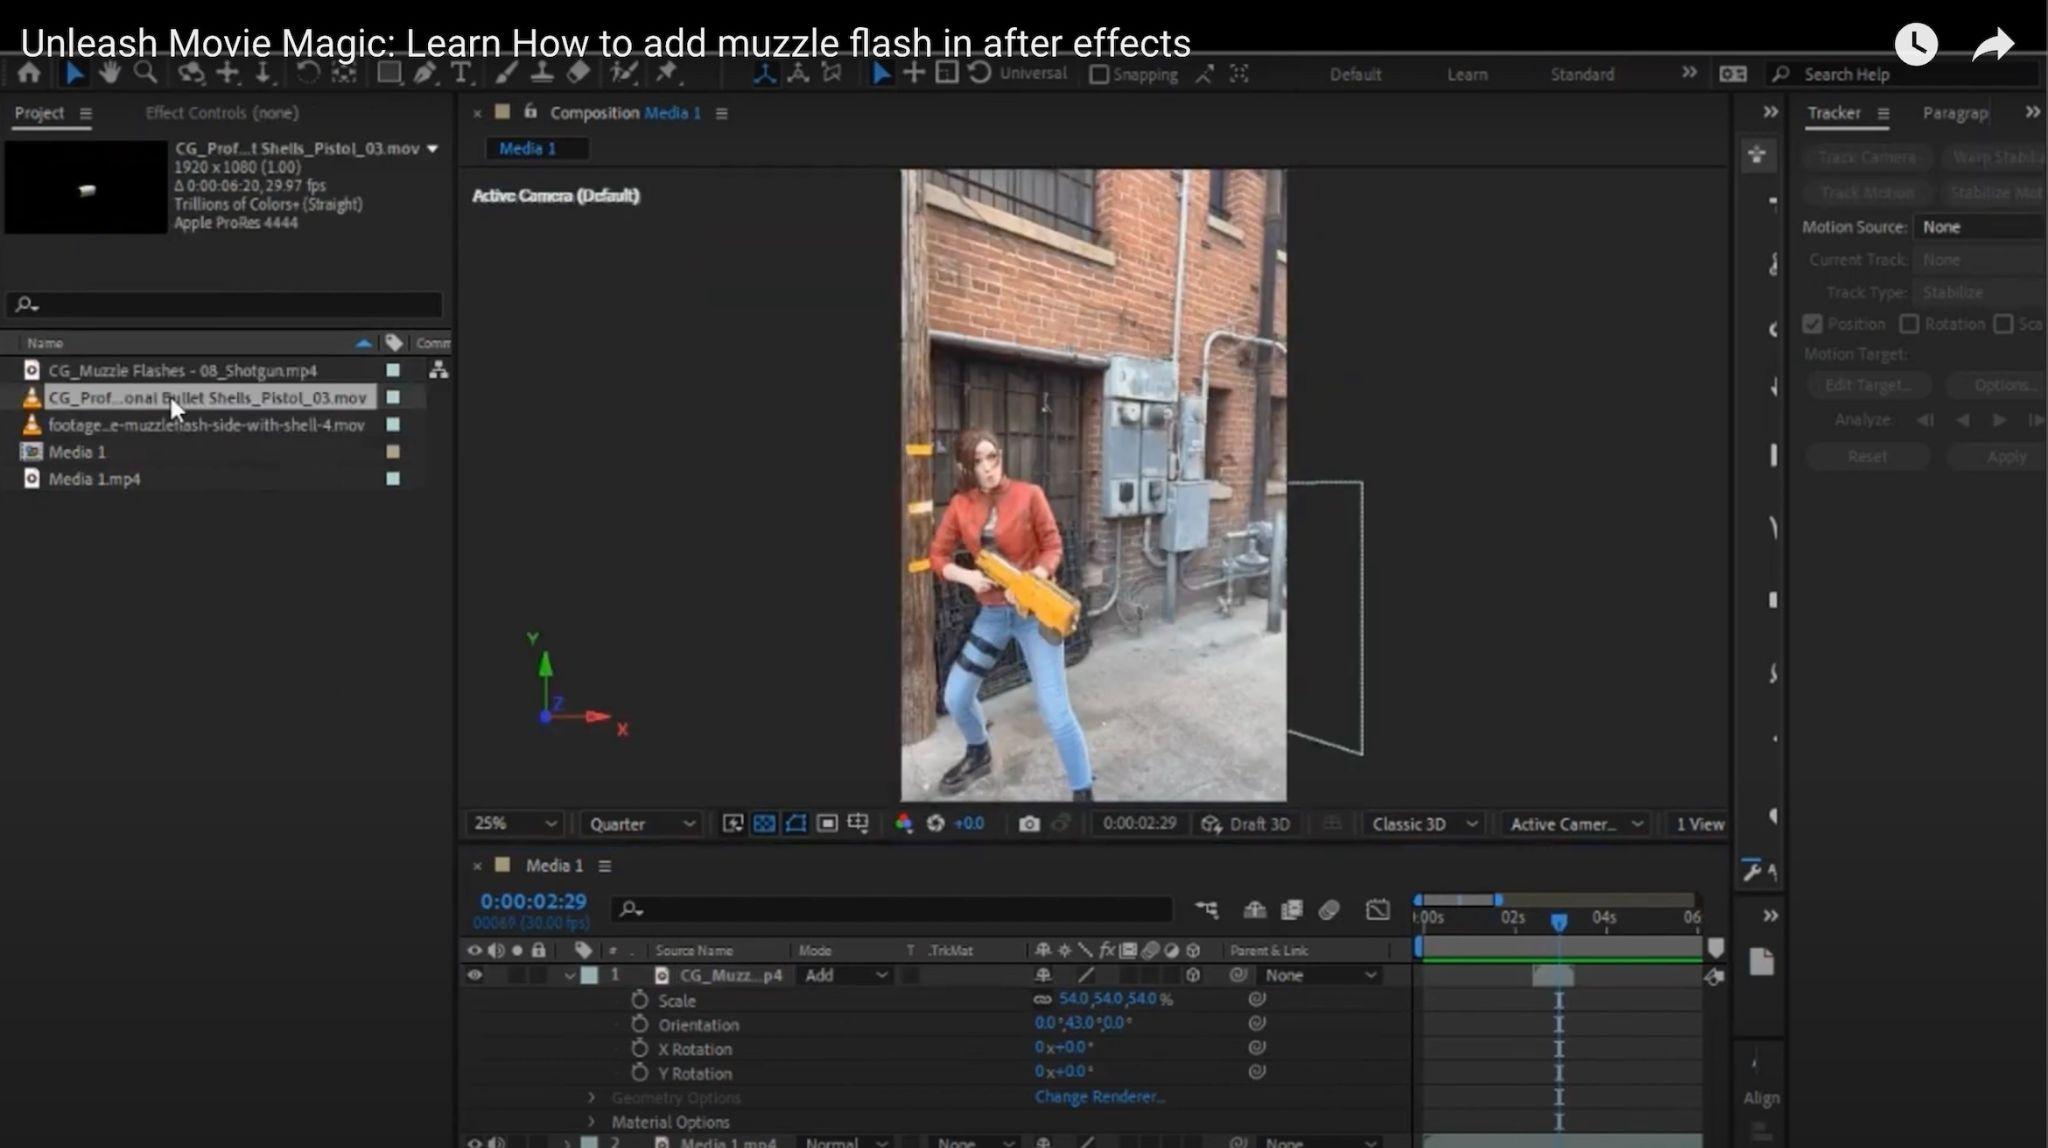

Once you have found a shell ejection asset that you like, import it into the project window.
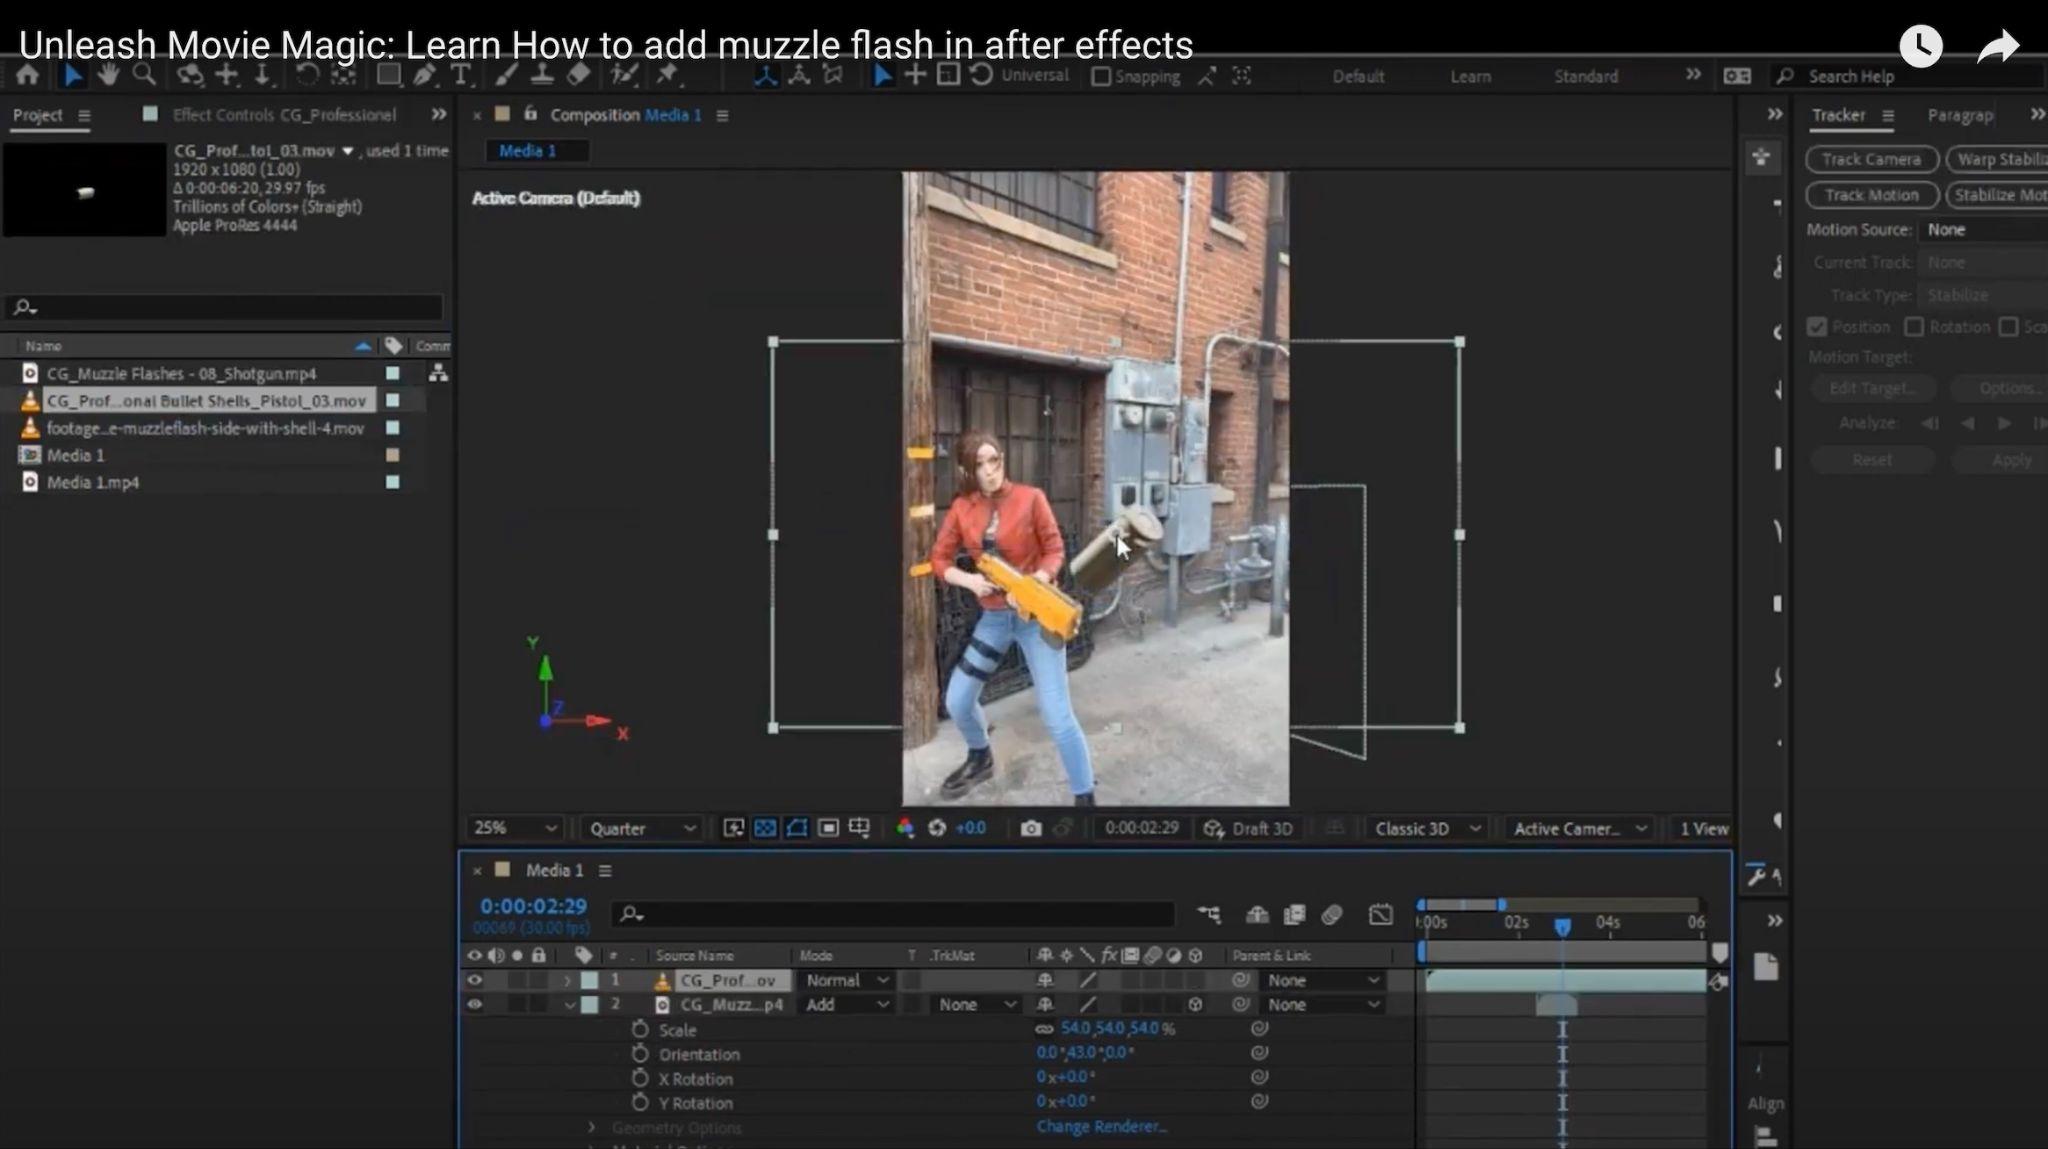
6. Scale and position the shell ejection
The shell ejection should be scaled and positioned so that it looks like it is being ejected from the gun. You can do this by using the Scale and Position tools in the toolbar.
7. Add keyframes
Finally, we need to add keyframes to the muzzle flash and shell ejection so that they move with the gun.
To do this, select the muzzle flash and shell ejection layers and then click on the “Create Keyframe” button in the Timeline panel.
Move the play head to the frame where you want the muzzle flash or shell ejection to start moving. Then, change the position of the layer.
Click on the “Create Keyframe” button again to create another keyframe.
Repeat this process for each frame where you want the muzzle flash or shell ejection to move.
8. Export the video
Once you are happy with the results, you can export the video. To do this, click on the “Export” button in the File menu.
Select the output format and settings that you want and then click on the “Export” button.
Your video will be exported to the location that you specified.
I hope this tutorial helps you add muzzle flash and shell ejection to a gun in After Effects.